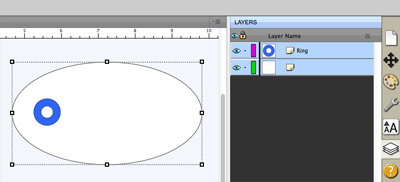
In order to use the Object on path, you must have at least 2 objects selected. The bottom layer will be the Path, and the layers above will be the objects we want to place on the path.
In this example, we will use an oval as the path, and place the Ring shape onto the path. So first, select both objects/layers and then choose Object on Path from the Effects menu.
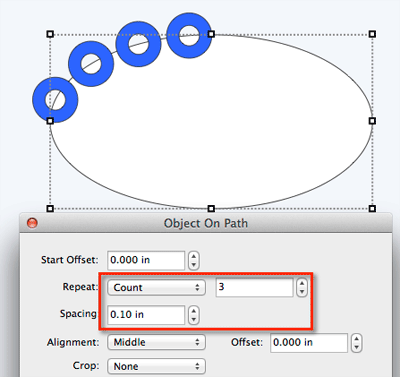
You can specify how many times you want the object to Repeat and the Spacing between each copy.
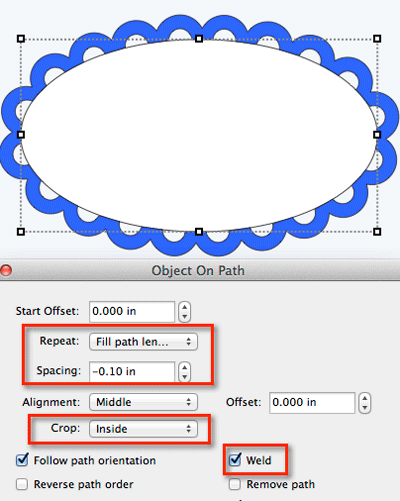
Set the Repeat to Fill path length to automatically add enough copies to fill the path. In this example, we have set the Spacing to a negative value so that they overlap, and then we checked the Weld box so that all the copies weld together. From the Crop dropdown, we have chosen to crop the Inside of the path, so it removes the parts of the objects that fall within the path.
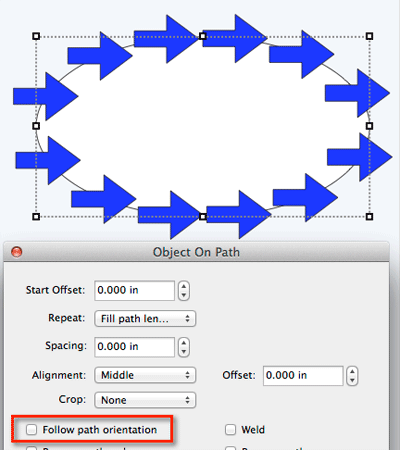
If the Follow path orienation is not checked, the objects on the path will copy without rotating.
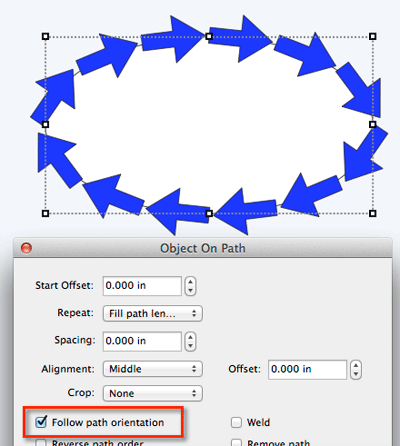
If the Follow path orienation is checked, the objects will rotate to follow the direction of the path.
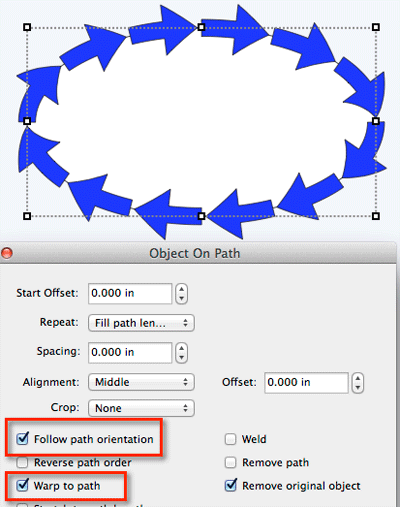
If the Warp to path is checked, the objects will wrap/distort to follow the path direction. In this example, you can see the arrows look like they are bending around the path.
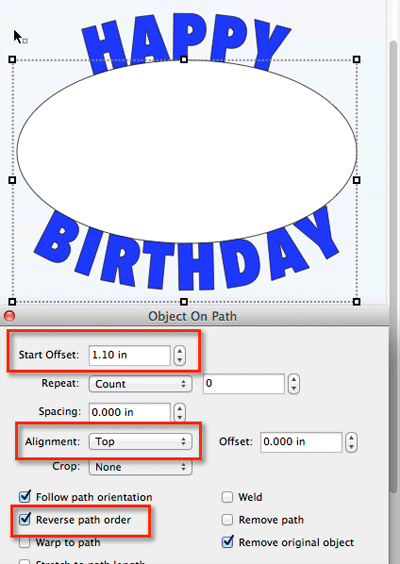
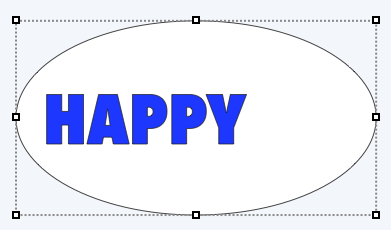
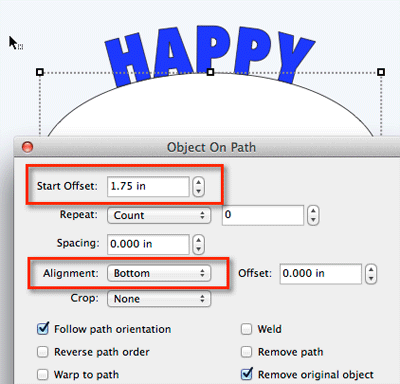
In this example we will put the word Happy on the top and Birthday on the bottom. First select the path and the Happy text and then choose Object on Path from the Effects menu.
Adjust the Start Offset to shift the Happy text along the path so it is at the top of the path. Set the Alignment to Bottom so that the bottom of the text is aligned to the path.
Next select the path and the Birthday text, and choose Object on Path from the Effects menu.

Check the Reverse path order so our Birthday text will read the correct way when we add it to the bottom. Adjust the Start Offset so the text is centered along the bottom and set the Alignment to Top, so that the top of the text is aligned to the path.